Contents
Installation
First, log in to your WordPress admin panel and head over to the Plugins section. Click on “Install” » “Upload” and select the downloaded zip-file to install.
After the installation was successful, you should see a new section labeled “ez Form Calculator” in the dashboard menu.

Add Forms
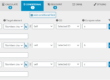
On the main page of ez Form Calculator, you can add a blank form or select a pre-built template in the dropdown menu. Make sure you choose “blank” to create an empty form and click on the plus button (1) to add a form.
- Add form (if a template is selected, the form will insert the template as a new form)
- Add template elements to current form
- Delete template
- Import form

Add Elements
When a blank form is added, you will see the following screen where you can add new elements. Click on any element on the right side to add it to the form. You can also drag and drop elements to the desired position.
Elements are divided into sections to find them easily:
- Basic: elements that don’t have a calculation or conditional section
- Calculation: elements that can be used for form calculations, conditions and discounts
- Other: various form elements including groups, file upload, HTML and many more
- Steps: divide form elements into steps with the step start / step end elements
- Predefined: (almost) ready-to-use elements so you can quickly add them to your form, e.g. tax calculation, newsletter signup or confirmation

Add Form to Page or Post
Once you have completed your first form, you can add the form automatically to a post (save / update form to post button), preview it in the backend (preview form button) or copy the shortcode and add it to an existing page, post or product.

That’s it – you’ve created your first WordPress Calculation form. Congratulations!
Check out the following articles to create advanced forms easily: